How To Add Your Face to AI Images For FREE - Stable Diffusion & Roop Tutorial
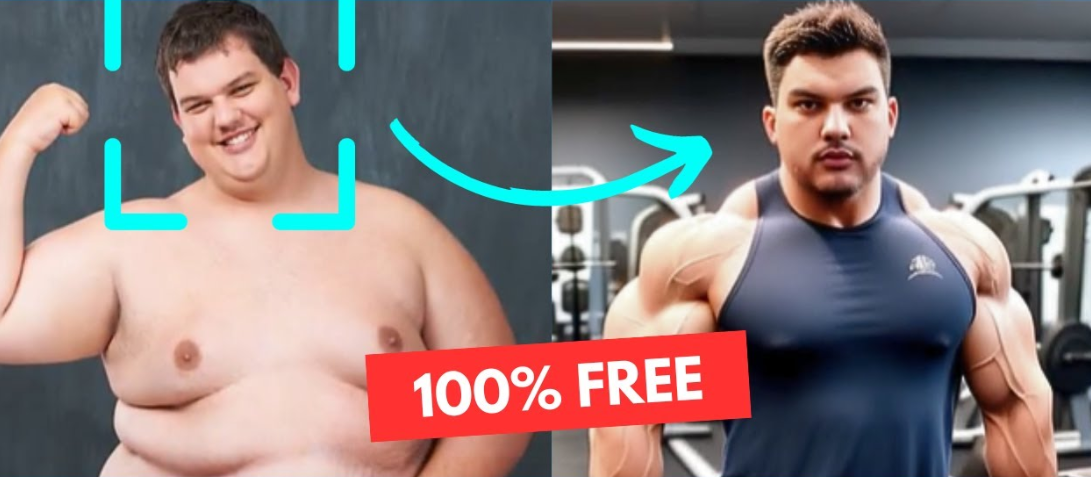
Today, I'm going to show you how to use your own face in stable diffusion and create images with consistent faces. It used to be super complicated to do this, such as training your own models and Loras, and it ended up not being worth it for most people. But I'm going to show you an easy, free-to-use plugin for stable diffusion that allows you to upload a reference image and then transform that face onto your outputted image. I'm going to walk through this plugin and show you everything you need to know. Let's get into it.
Prerequisites
Before we hop into stable diffusion, we need to get a few prerequisites. So first, go ahead and download this Visual Studio Community.

Now, once that has been downloaded, go ahead and open it. Then you're going to be presented with a list of things that you can tick on or off. So, you're going to want to select the Python development, the desktop development with C++, and then the Visual Studio extension development. Then just go ahead and hit install, and then you'll have to wait for that to load. When that's done, you have one more thing to do. Go ahead and open up a command prompt terminal and then type in this command (pip install insightface==0.7.3). Then go ahead and hit enter, and then it should just install. When it's done installing, you can go ahead and close out of the window.
Installing Roop
Now with those prerequisites installed, go ahead and open up stable diffusion, and then head over to “extensions” and hit the “available tab”. Then just hit “load from”; then in the search bar, go ahead and search for roop.
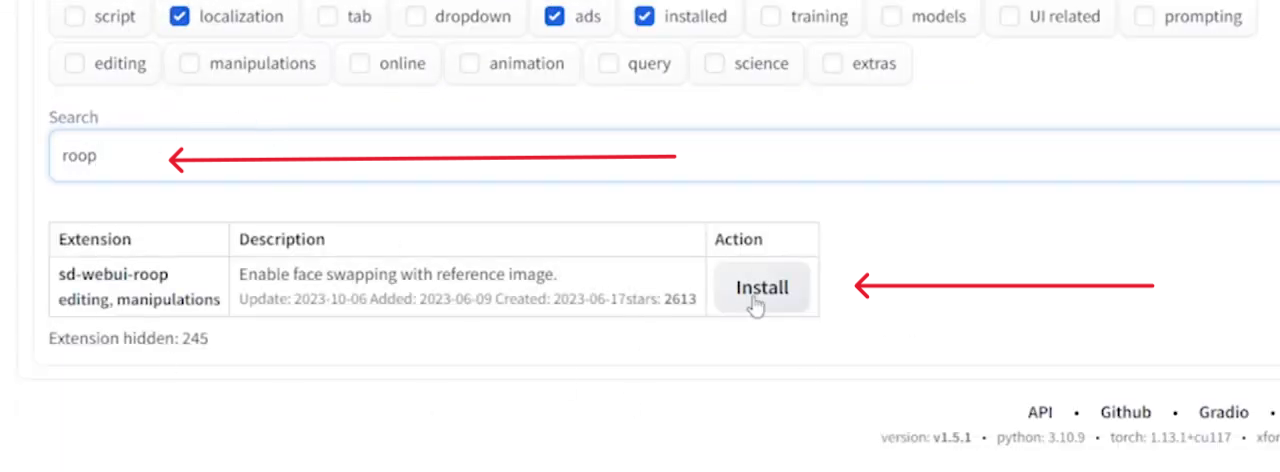
There should only be one option, so just go ahead and install that one. Now once it's done, go back to the “installed" tab and hit “check for updates”, and then apply and restart UI. Once that is all done, you should see that you have Roop.
Getting Started with Roop
Now once you've confirmed that you have Roop installed, fill out whatever settings and prompts you want. Then, open up this roop tab,
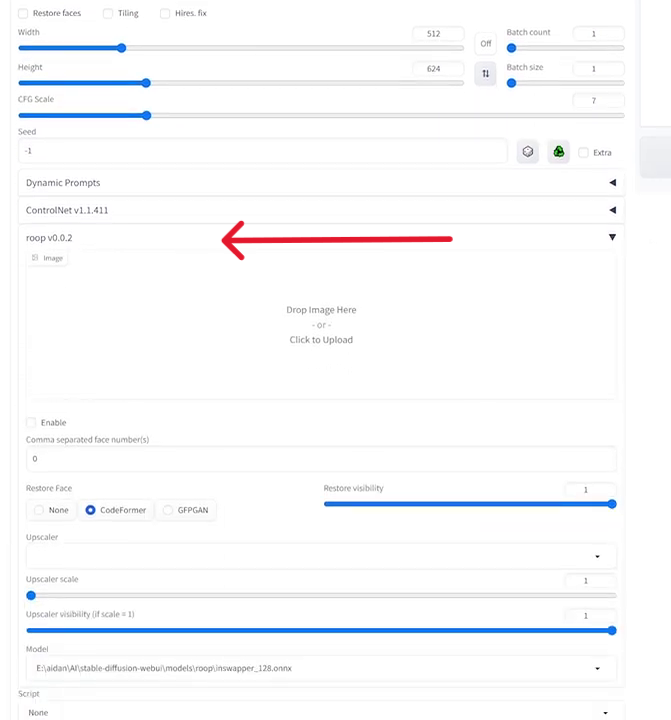
and then you'll notice here that there is a place to drop your image in. Now the image that you upload right here will be the image of the face that you want to extract and then put onto the new output. So to start, I'm going to use an image of Jim Carrey.
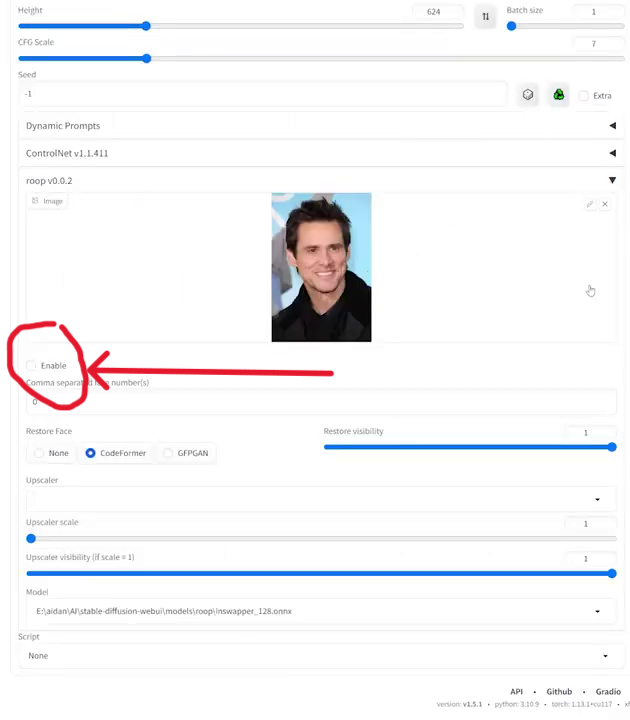
Now we have to hit enable because this is what tells it that we want to use Roop. Without adjusting any of these settings, it should work perfectly fine. So I just have a prompt for like a man in a suit (High quality, highres, person, man, suit, red tie, city background, portrait, headshot, one person). Let's go ahead and generate that and see what it gives us, and there we go.
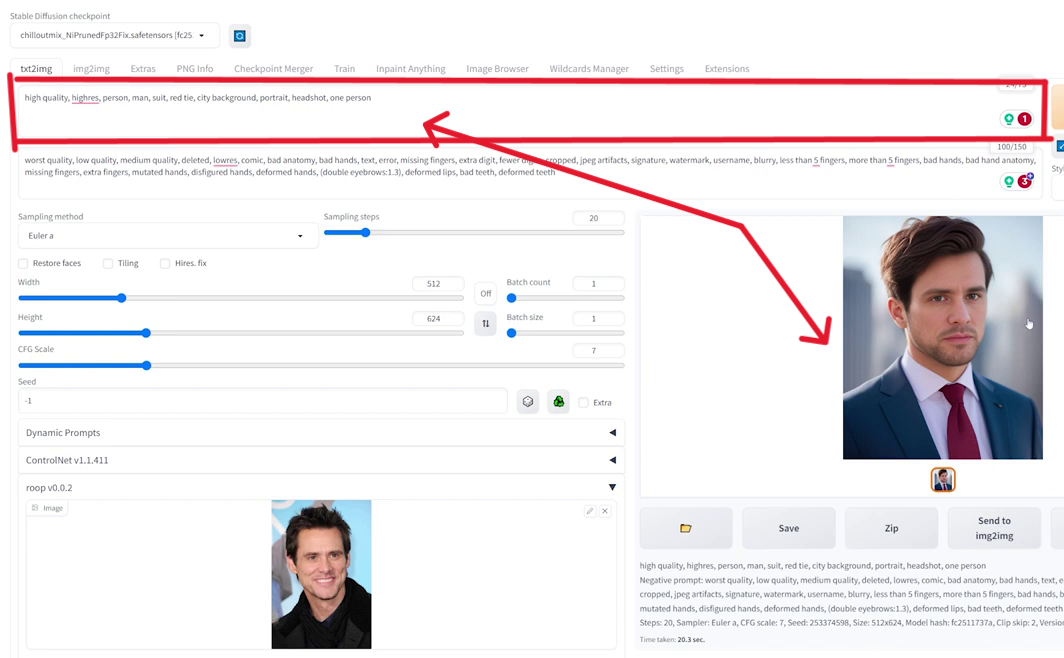
We have our output, and this looks pretty good. Now at first, you might be inclined to say, well, this didn't do a good job at all. He's not smiling, and it just doesn't look the same. If we want this character to be smiling, we'd have to indicate this in the prompt.
As another example, let's do Michael Scott just so that way we can see that it is, in fact, doing the correct face.
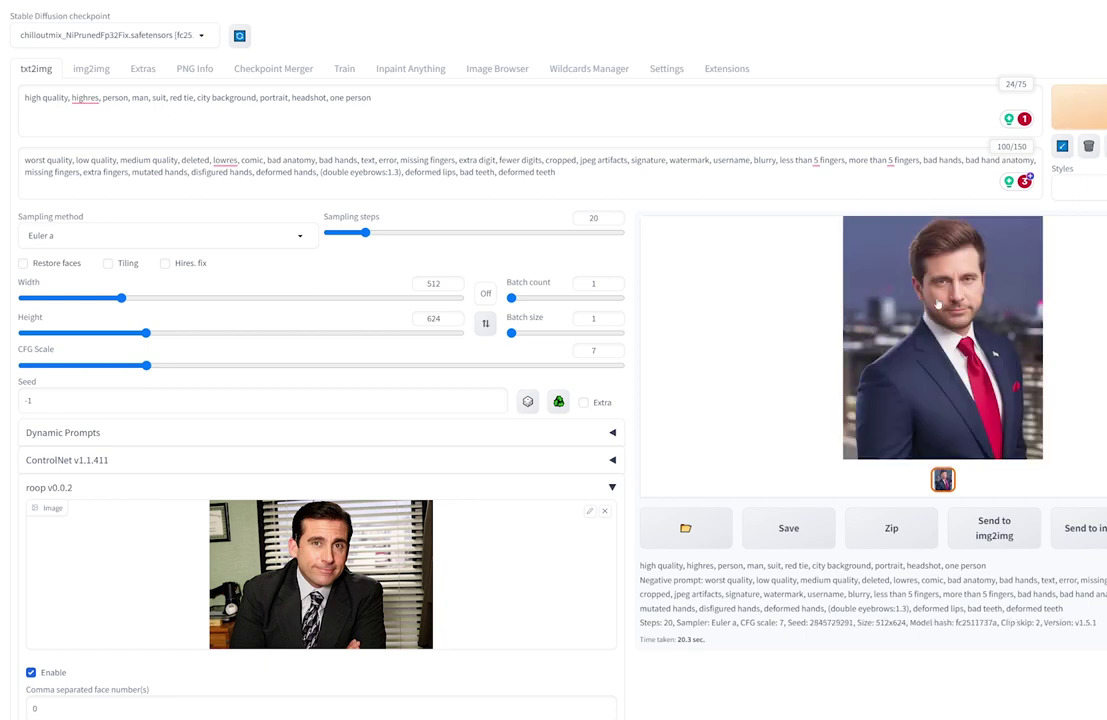
And there we go. This definitely looks like Michael Scott, and you can see the resemblance!
Advanced Settings
This is all pretty cool, and it works really well just straight out of the box. But there are a couple of other settings here that I do want to address. First, check this restore face option.
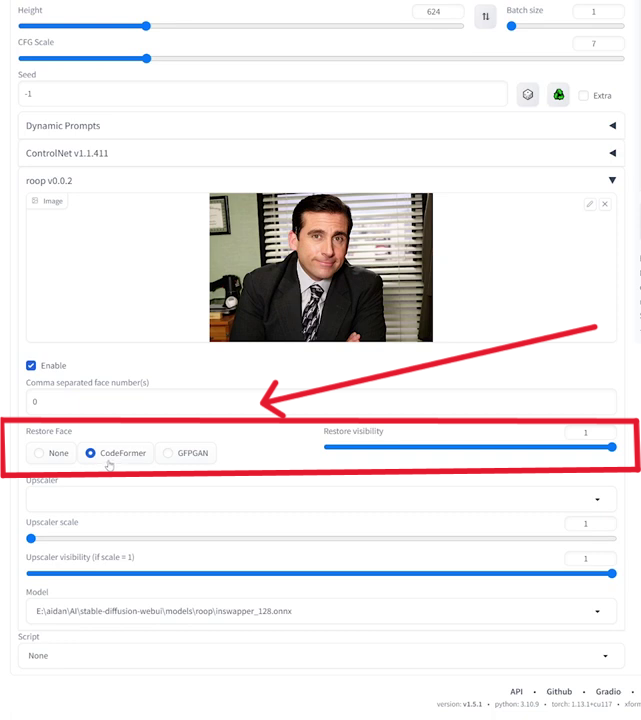
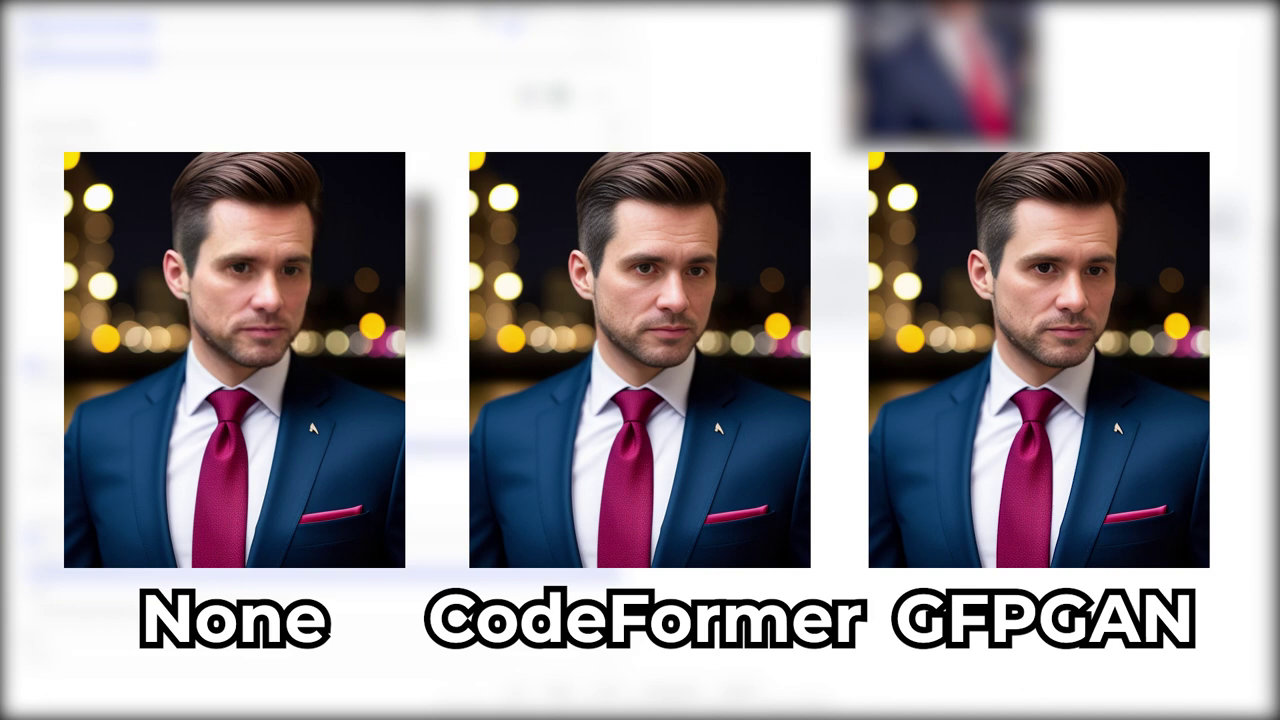
You should be using either CodeFormer or GFPGAN. To me, they're very similar, and the difference is pretty negligible. I prefer to use CodeFormer, but here's an example of using none and then the two other options.
The next thing I want to talk about is this upscaler here.
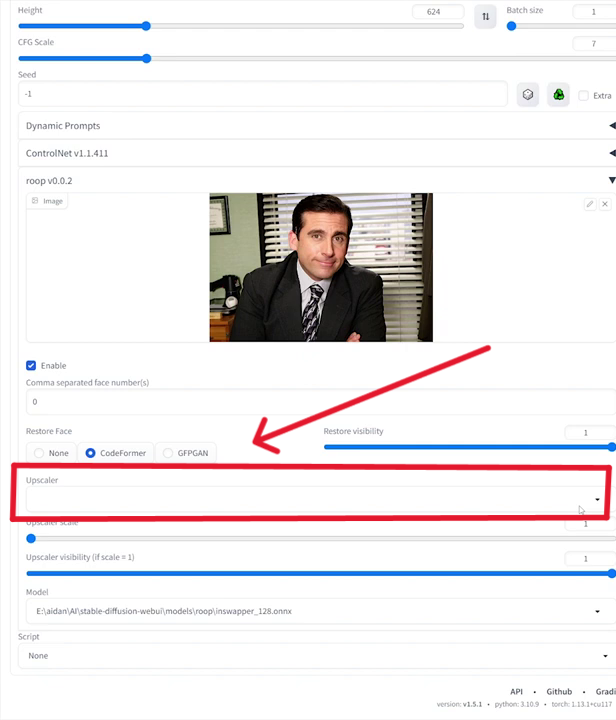
This is a built-in upscaler, but I don't typically use this because I'd rather have it just do the base image and then upscale it after for the fact. But it's here if you'd like to use that.
Now, finally, I saved the most complicated for last. We have this comma-separated face numbers. Now you might be like, what does this even mean? Well, if you have multiple people in your shot, you have to tell Roop which person you want the face to be applied to. Now it starts at 0 and goes from left to right. So because there's only one face here, this guy is labeled as number 0.
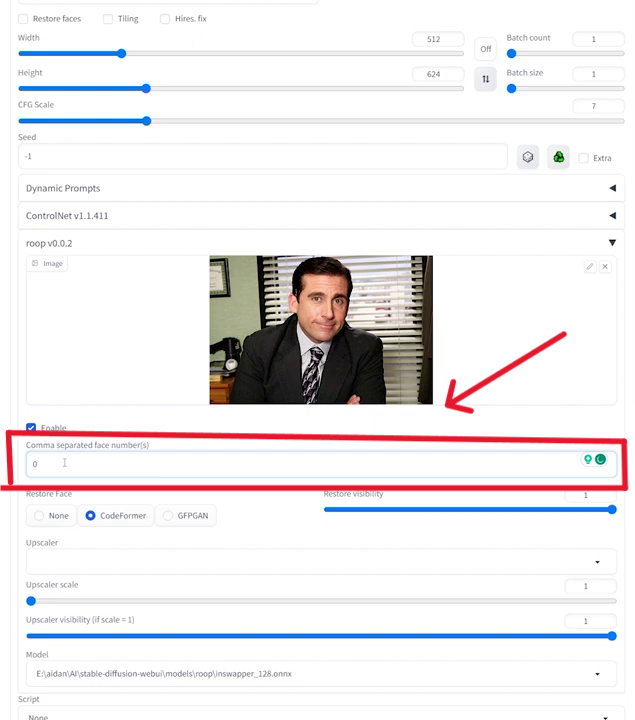
But I have a prompt with two people, so let's go ahead and just generate a new one, and then I'll show you what this does.
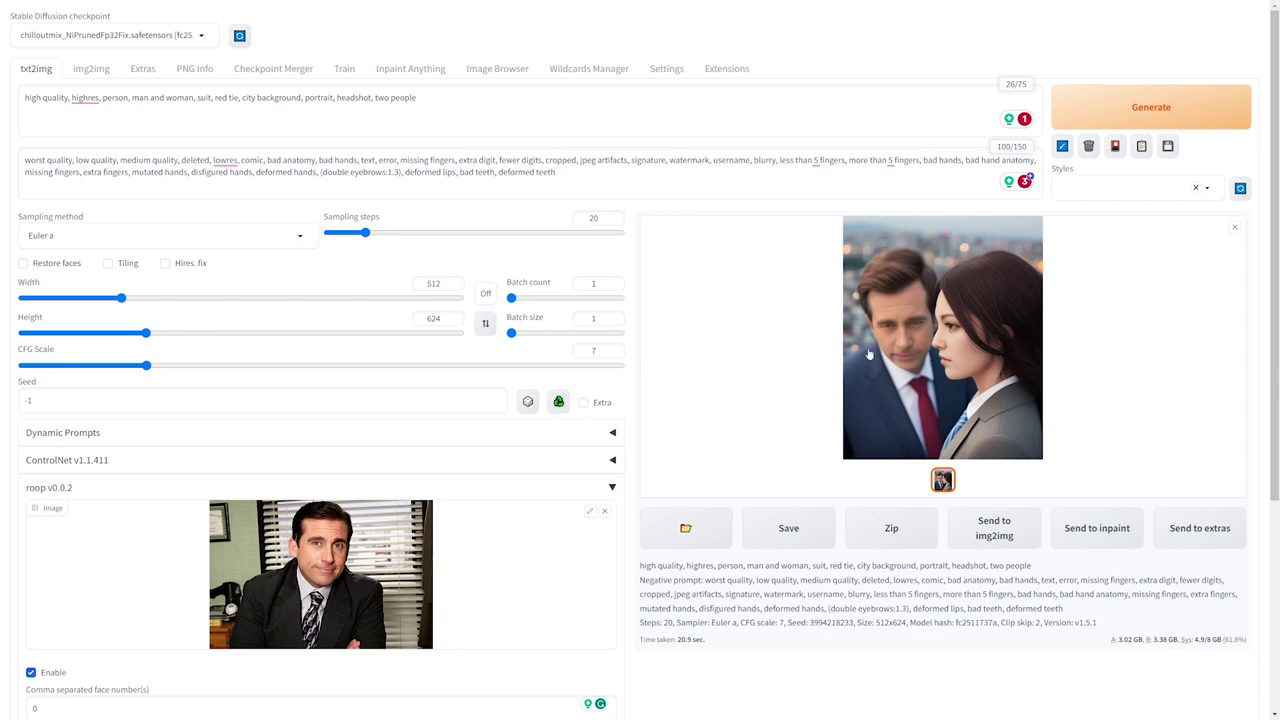
Now you'll see for this one, we got two different people, and it only applied the face to the leftmost one because it goes from left to right. But if we were to use this same seed and change this 0 to a 1 then it's only going to apply to the face on the right.
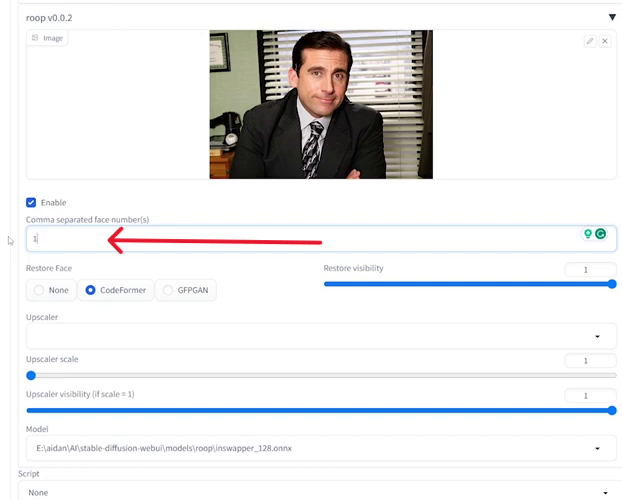
And there we go.
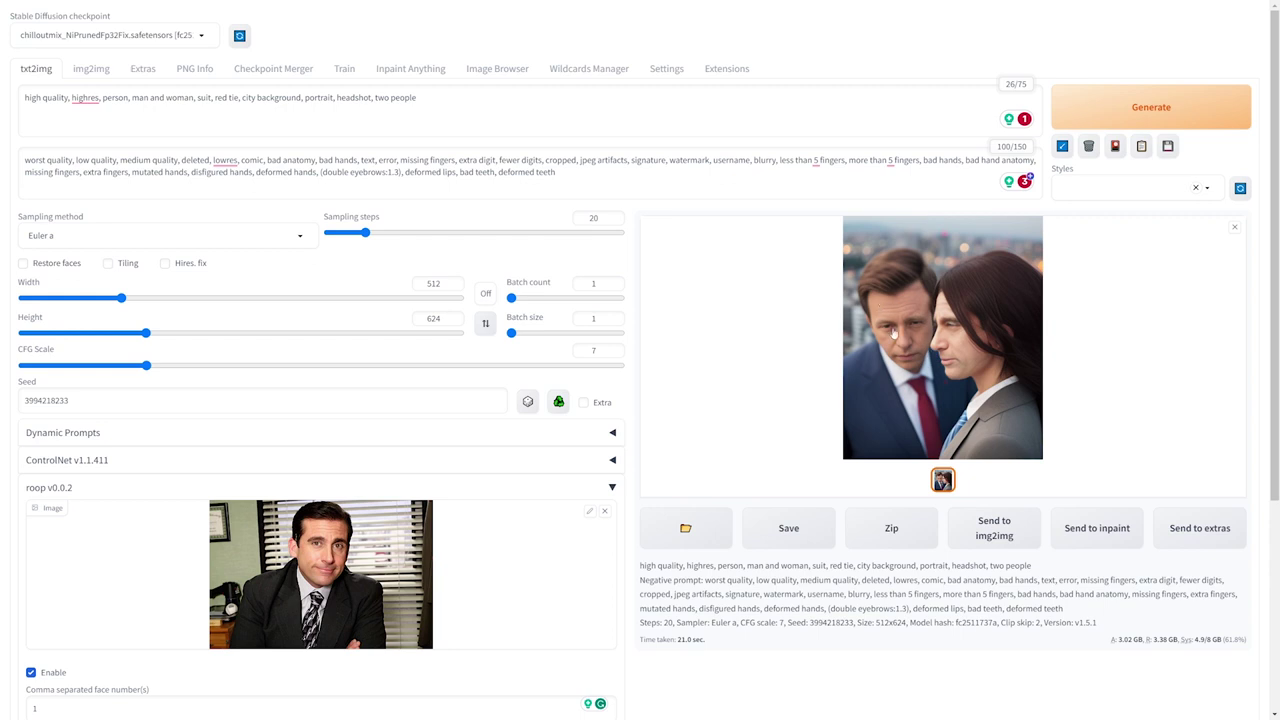
We can see the original face on this guy, and then it definitely tries to do its best job with this side angle here. And it does; it's actually not terrible, it could have definitely been worse for like a full-on side shot. But yeah, I think it does a great job. And then you could also do 0 comma 1
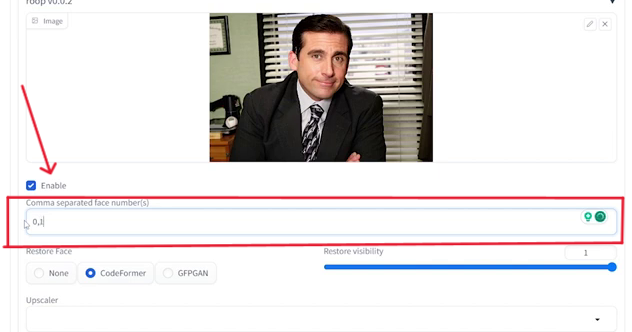
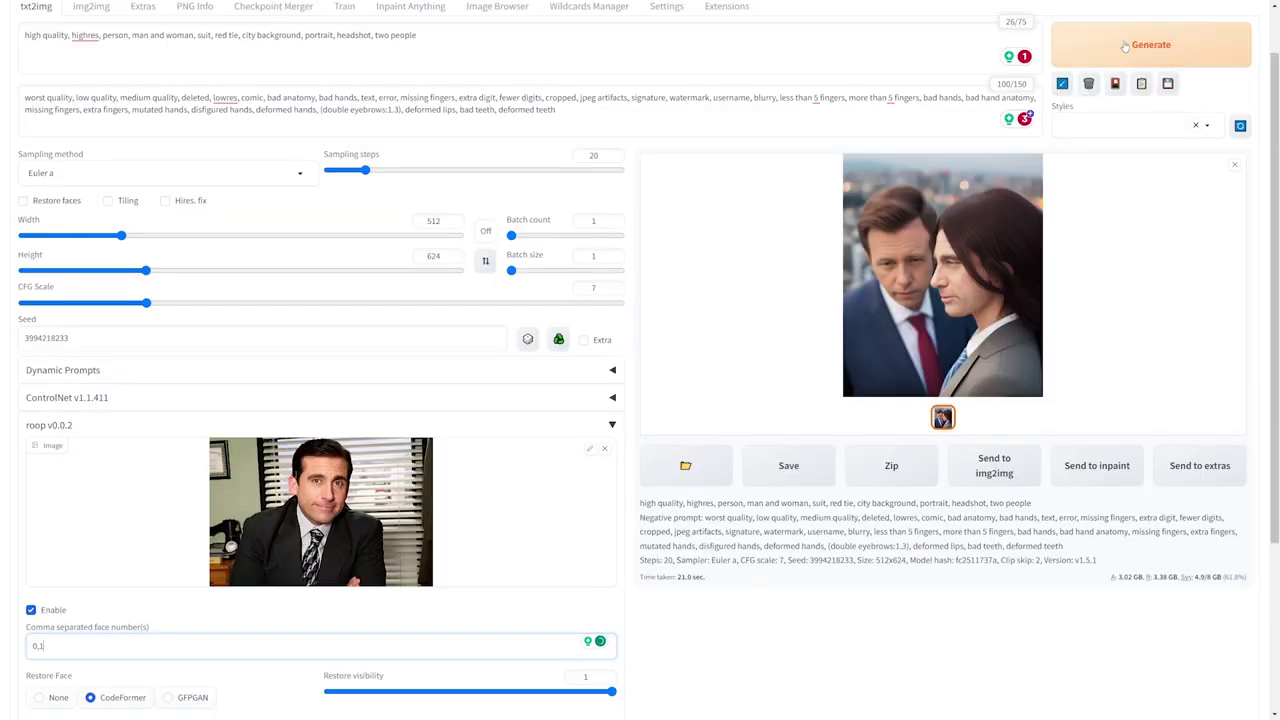
and then it'll apply the face to both, and there we go; we got both applied.
Extra Examples
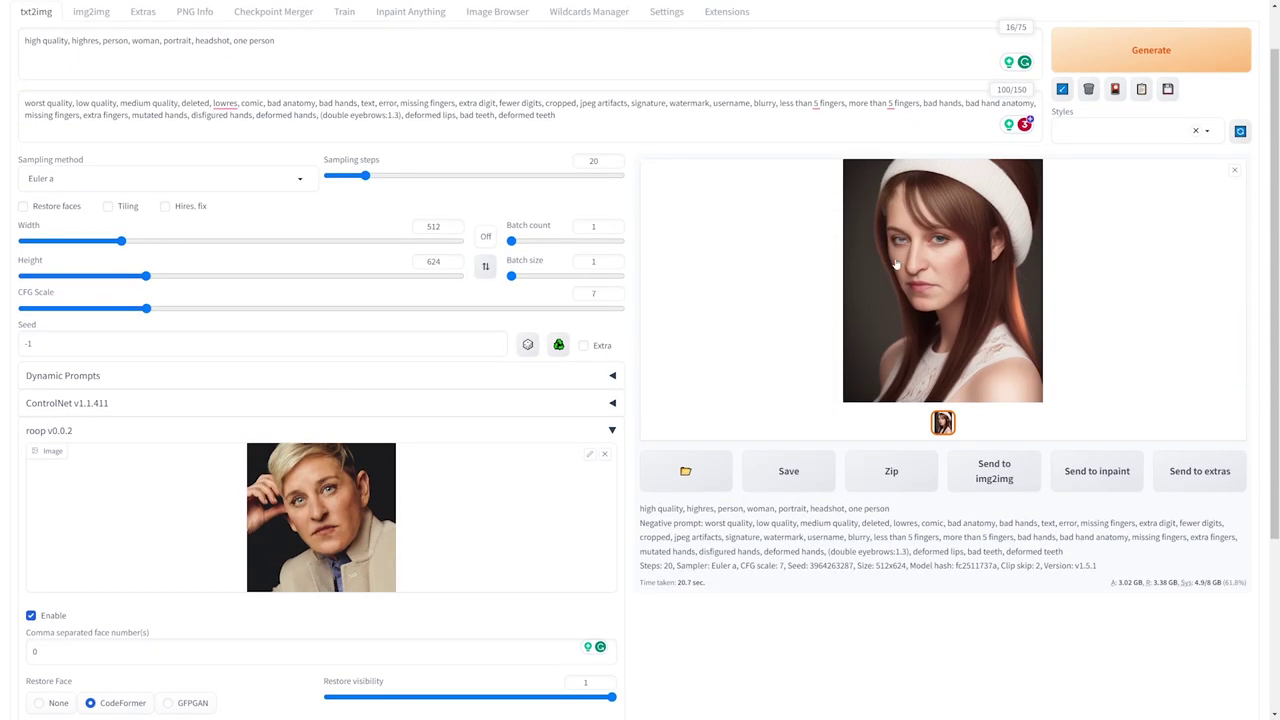
Here's another example just with basic settings with Ellen DeGeneres, and you can see it does a pretty good job.
You might be wondering, does it work on cartoon characters? And as long as they look 3D and more realistic enough, it'll try to match it the best it can.
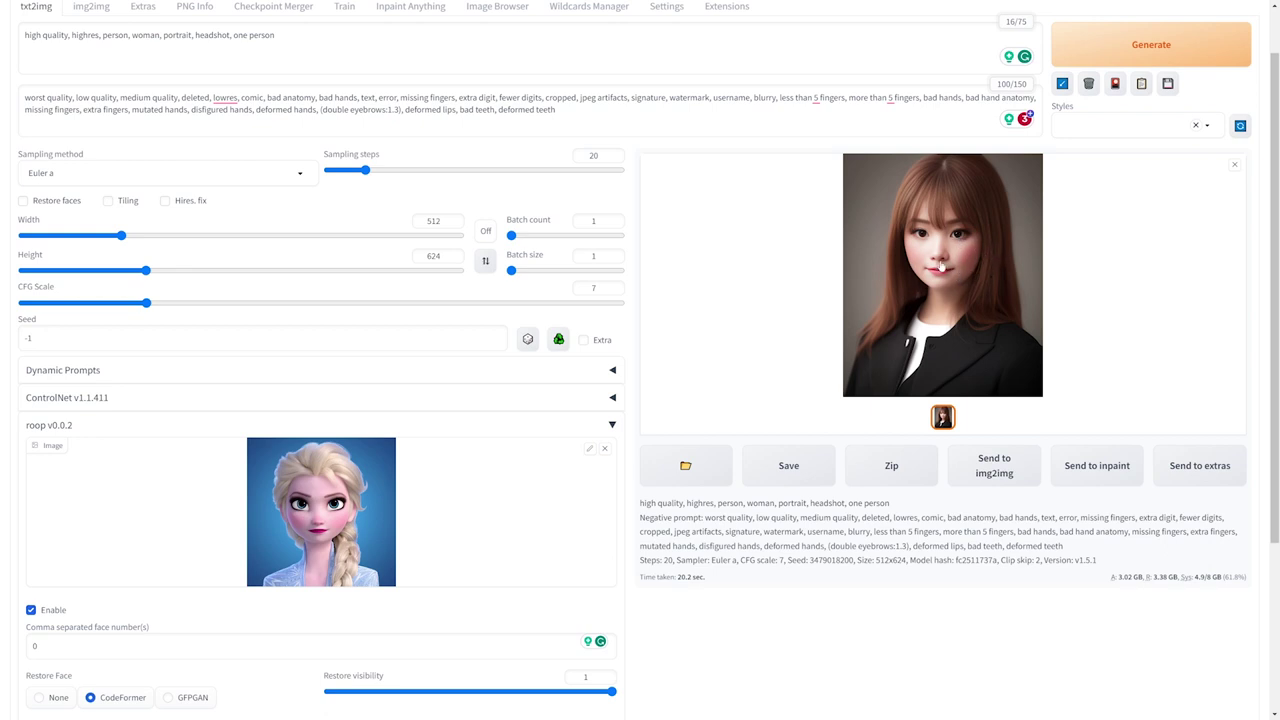
You can see that it copies the blush and the red lipstick and sort of just the face in general. So it does a pretty good job with things that aren't exactly super realistic.
And that's how you can use anyone's face in Stable Diffusion!
Subscribe to the AI Search Newsletter
Get top updates in AI to your inbox every weekend. It's free!